NEWS & BLOG

Breaking news and resources from across the industry.

MBAKS Blogs:
Homeowners
  • Building Character With Reclaimed Wood

    by User Not Found | Aug 01, 2019

    Reclaimed wood

    Q: I’m considering building a wood mantel for my fireplace and a few matching furniture pieces to go with it. I’ve been very impressed with photos of salvaged wood in remodel projects, but I don’t know much about it. Is it worth hunting down? Or can I get the same effect with new wood?

    A: If you open any magazine, watch any DIY design show, or spend 15 minutes on Pinterest, you will see that salvaged or reclaimed wood is a hot design feature. Naturally, being inundated with pictures of beautiful reclaimed lumber walls, furniture, beams, and floors can inspire anyone to spice up their space. However, terms like salvaged lumber, reclaimed materials, and barnwood can be overwhelming to newcomers. So let’s take a brief introductory tour of reclaimed wood:

    The first question a lot of people ask is if reclaimed lumber in salvage yards is essentially the same as lumber at Home Depot. And my answer is always the same: absolutely not.

    So, what is reclaimed lumber? It’s high-quality wood removed from structures like barns, warehouses, homes, etc., for repurposing. This material typically comes from old-growth forests rather than forests planted with genetically selected fast-growing seeds. If you compare an end cut of a two-by-four sold at a modern lumber yard to a reclaimed two-by-four end cut, you quickly notice a big difference: growth rings. The growth a tree experiences in a year is measured by rings per inch. A newly harvested fast-growth tree will have just a few growth rings per inch, versus up to 200 growth rings in a single inch of old-growth. The tighter the growth ring, the stronger and harder the wood.

    Farmed trees are harvested at an average age of 65 years, while old-growth trees can be several hundred years old and air-dried for more than 60 years. Since the lumber has dried slowly, it has had time to warp, crack, or check so you know the material is incredibly stable and you can depend on reclaimed lumber’s strength and durability for any project you pursue.

    Reclaimed lumber has the beautiful wear and patina of its previous life, which may include discoloration due to oxidation, nail staining from its original application, or original saw blade patterns—these “blemishes” add rich, lived-in character. Reclaimed lumber is sustainable and eco-friendly because it’s recycled; newer trees are not being harvested for your project. A neat bonus feature of reclaimed lumber is that if you purchase it from a salvage yard or directly from the source, you can even learn its amazing history.

    When using reclaimed lumber in a project, it is important to note that it is typically considered a furniture-grade material, meaning it’s perfect for furniture, wood accent walls, cladding (wrapping an item with a material), fireplace mantels, shelving, countertops, and more. Timber framers, craftsmen, and furniture makers love using old-growth beams and lumber in projects due to the structural stability of the wood. You can even use it as a main support beam in your home or building. Just make sure to check code requirements first.

    By using reclaimed lumber in your project, you will not only achieve a warm, rich, earthy feel. You will know the material is high-quality, locally sourced, and has a long history. And by reusing old lumber, you will save new trees from being harvested. Now take those eye-catching inspirational images, head to your local salvage yard, Craigslist, or a friend’s remodel, and start building your perfect statement piece today!


    Lacy Kabrich is the marketing and sales director of Earthwise Architectural Salvage, a member of the Master Builders Association of King and Snohomish Counties (MBAKS). If you have a home improvement, remodeling, or residential homebuilding question you’d like answered by one of MBAKS’ nearly 2,800 members, write to homework@mbaks.com.

  • August 2019 Builders Bulletin: Builder Permits Down, Supply of Inventory For Sale Still Low in Seattle Metro Area

    by User Not Found | Jul 26, 2019

    By MBAKS Senior Policy Analyst Allison Butcher

    Single family permits in the Seattle metro area were down 14% and multifamily permits down 6% through the end of May, compared to the same period last year. Meanwhile, the supply of homes for sale continues to be very low—just 1.77 months in King County and 1.49 months in Snohomish County during June. These are just some of the housing statistics you’ll find reported on in the latest Builders Bulletin.

    The Builder's Bulletin is intended to provide a convenient way to track housing in our market and includes information from the Northwest Multiple Listing Service, State of the Cities Data Systems, Office of Financial Management and the Washington State Employment Security Department.

    Download this month's report:

    August 2019 Builders Bulletin

  • What New ADU Legislation Means for Seattle Homeowners

    by User Not Found | Jul 25, 2019

    Charming red backyard cottage with string lights over a patio

    Q: I’ve read recently that Seattle has made it easier to build ADUs. My partner and I think this may be a great opportunity to rent out space in our backyard for some extra income, but we don’t know all the ins and outs. What do we need to know before we start? 

    A: If you’re looking for extra rental income or a private space for out-of-town guests or aging parents, accessory dwelling units (ADUs) are a great option. ADUs—an umbrella term for mother-in-law suites and backyard cottages—are additional residences built on the same property as an existing single-family home. Detached accessory dwelling units (DADUs) are simply ADUs detached from the main house. 

    Both ADUs and DADUs generally include living rooms, bedrooms, kitchens, bathrooms, and their own entrances. They’re common on the east coast and in populous Midwestern cities such as Chicago, but have been slow to take root in Seattle—until now. On July 1, the Seattle City Council voted unanimously to make it easier for homeowners to permit and build ADUs. Many believe this will lead to more affordable housing options and additional income for homeowners interested in renting out space.  

    The rule changes have been fiercely debated, but most Seattleites and City Councilmembers agree that easing restrictions will increase housing options and affordability. If you own a single-family home, building an ADU can bolster the city’s housing supply while creating a multi-purpose space on your own property. The new legislation will take effect 30 days after Mayor Durkan signs her approval.

    So, what do the new ADU rules mean for Seattle homeowners? 

    The old rules required homeowners in single-family zones to live onsite, preventing DADUs from being built on rental properties and making it impossible for homeowners to move out and keep their home and ADU as two rental properties. They also required an off-street parking spot for each ADU, so homeowners sans off-street parking could not rent out ADUs. None of these rules apply anymore. Size restrictions have also been eased to allow larger, taller DADUs, making them easier to design and build.

    With the end of these restrictions, this is a great time to jump into the exciting world of ADUs! Perhaps the best part about them is the tremendous flexibility they offer. They can be a home office one year and a rental apartment the next. They can house your grown children or your parents. The choice of how you design or use them is all yours.

    Your finished basement or attic can easily be converted into a mother-in-law suite by adding a kitchenette. Your overgrown backyard can become a residence for college students or retirees interested in tiny home living. If you’re looking to downsize yourself, you could move into your new DADU and rent the main house out. The best part is you can design these spaces to blend in with the style of your current home or give them colorful personalities of their own.

    Whether you’re building out an existing structure or creating a new space from scratch, working with an experienced designer and builder is highly recommended. Permits and building codes must be met and designing small spaces isn’t always as easy as it looks. More planning means more personalization and a smarter layout. There are plenty of ADU advocates across the city who have been designing, building, and championing these alternative housing types for years. They’re your best bet for success and, as you can guess, they’re already getting inundated with phone calls from eager homeowners.

    If an ADU sounds like a good fit for your property, have a professional visit your site and lay out your options. The number of ADUs is expected to rise exponentially in the next few years and your home could be a contender for one of these highly sought-out spaces.


    Jason Legat is founder and president of Model Remodel, a member of the Master Builders Association of King and Snohomish Counties (MBAKS). If you have a home improvement, remodeling, or residential homebuilding question you’d like answered by one of MBAKS’ nearly 2,800 members, write to homework@mbaks.com.

  • Make Your Home One With the Outdoors With a Big Door

    by User Not Found | Jul 18, 2019

    Big door

    Q: We have a nice open kitchen facing our backyard deck, but it only has one small window and a cramped side door. How can we bring more natural light into the kitchen and make our deck more accessible?

    A: One of the most common questions homeowners ask during the design phase of a remodel is, “How can I create better flow between interior and exterior spaces?” The easiest way to do this is by using lots of glass to bring in natural light and scenery. But if you want even more flow, there is a way to blur the line that separates indoor and outdoor space by literally opening your home to the outdoors: a big door system.

    Big doors provide floor-to-ceiling light when closed and instantaneous connection to nature when open, making them perfect for the Pacific Northwest lifestyle in all seasons. Imagine being able to hear, smell, and feel the essence of the rain on a spring day, but never get wet, or watch as your friends and family move effortlessly between your summer BBQ on the patio and the refreshments in your kitchen.

    Big doors come in two basic styles: sliding and folding. Folding doors are the most popular because the panels fold out of the way when fully opened, maximizing the opening width. These doors are ideal for smaller-sized openings in the 6’–12’ range, where opening width is more essential than maximizing the view. Folding doors are also great for remodels since they are designed to fit within existing wall dimensions.

    Sliding doors can accommodate much larger panels. They’re a great option when you want views even when the doors are closed. When standard sliding doors are fully open the panels stack to one side of the opening, reducing the overall opening space by the width of the panels. However, there are sliding door systems where the door can be nested in the wall and completely disappear when open, a big advantage over folding doors. Sliding doors are also better for automated opening and closing systems.

    Many consumers assume big doors are expensive and require major construction to install, but these days they’re not the big to-do they once were. There are dozens of systems on the market covering all different price points with different sizes to fit every home. In fact, quite often you can simply replace an existing door and window with a big door. Of course, if you’re planning an ambitious major remodel that opens an entire room, there’s a big door for that too—some can span more than 30 feet!

    Whatever option you’re looking for, there is certainly a big door that can meet both your lifestyle and budgetary needs. Nothing is better at breaking down the barrier between our living space and the wonderful outdoor environment we all call home.


    Darren Kiesler is owner of The Big Door Company, a member of the Master Builders Association of King and Snohomish Counties (MBAKS). If you have a home improvement, remodeling, or residential homebuilding question you’d like answered by one of MBAKS’ nearly 2,800 members, write to homework@mbaks.com.

  • Hiring a Contractor: Fixed Bid or Time and Materials?

    by User Not Found | Jul 11, 2019

    Contractor reviewing house plans

    Q: What type of contract should I ask for when hiring a builder to remodel my home?

    A: You’ll have two main types of contracts to choose from: fixed bid and time and materials (sometimes called a cost-plus contract). A fixed bid is exactly what it sounds like—a guaranteed, all-in price for the complete project. A time-and-materials contract will usually provide an estimate, but there is no guarantee the final bill will match that amount; they will simply bill you for all the materials that go into the project, plus an hourly rate for labor and the contractor’s markup.

    Each type of contract has its own unique advantages and disadvantages. Let’s look at some of the main points you’ll need to consider when deciding which type to pursue.

    Pros and Cons of a Time-and-Materials Contract

    A time-and-materials arrangement shifts the risk of cost overruns to the homeowner, which means the contractor can potentially complete the project for less money than estimated. Time-and-material contractors will point out that taking on the risk themselves would require adding a certain amount of contingency to their bid to cover any unforeseen developments.

    This is true in theory, but the reality is that time-and-materials contracts tend to encourage less precise estimates because estimating accurately is time consuming and requires ample experience. There is little incentive to put in this extra effort and none for maximizing efficiency. In fact, if your project takes longer and costs more, the time-and-materials contractor will benefit.

    Pros and Cons of a Fixed-Bid Contract

    The main benefit of a fixed bid is that you will know upfront exactly what your project will cost and can plan accordingly. The biggest immediate drawback is the difficulty of finding a contractor willing to offer a fixed bid. If you send your building plans to several general contractors and ask them to calculate fixed bids, you will, in theory, receive several well-organized bids that you can compare.

    But many general contractors refuse to take part in competitive bidding processes, especially when demand is high. Properly checking prices on materials and getting bids from plumbers, electricians, and other busy subcontractors can take dozens of hours. This is wasted time for the contractor if their bid is rejected.

    Choose the Contract Type That Best Matches Your Project and Your Personality

    When planning a remodel, you’ll face lots of decisions on everything from plumbing fixtures to room layout. Choosing the type of contract may seem like a relatively minor one, but it can have a major impact on your remodeling experience.

    For smaller, less complicated projects, a time-and-materials contract may be your only choice and it may even save some money as very little work goes into creating an accurate estimate. However, it could also end up costing you considerably more than the original estimate. It’s not uncommon to hear of projects like kitchen remodels costing 30–50% more and taking twice as long. Choose time-and-materials when you’re eager to get started as soon as possible and cost overruns and schedule creep aren’t major concerns. If you’d rather avoid uncertainty on the price and are willing to take your time making all your design decisions upfront, choose a fixed-bid contract.

    Design-Build and Fixed Bidding Work Well Together

    Design-build is a remodeling approach wherein you hire a single company to design and complete the construction of your project. This approach lends itself well to the fixed pricing model because the building team is involved with the design process right from the start, providing accurate estimates that will help keep the design within your budget. It’s one of the most reliable ways to integrate accurate cost estimation throughout the entire design process.

    A Word About Allowances

    There are very few bad licensed contractors out there, but there are a handful who have difficulty with estimates. Some contractors will say they are giving you a fixed bid, then stack it with allowances for major line items, like plumbing and electrical work. If the work ends up costing more than the allowance, you’re on the hook for the overrun. When examining a bid, it’s okay to include allowances for small items, like light fixtures and towel bars, but make sure that the price for all labor is fixed.


    Teri McDermott is owner and operations manager of CRD Design Build, a member of the Master Builders Association of King and Snohomish Counties (MBAKS). If you have a home improvement, remodeling, or residential homebuilding question you’d like answered by one of MBAKS’ nearly 2,800 members, write to homework@mbaks.com.

  • Denizen Development Group: Madrona 12

    by User Not Found | Jul 01, 2019

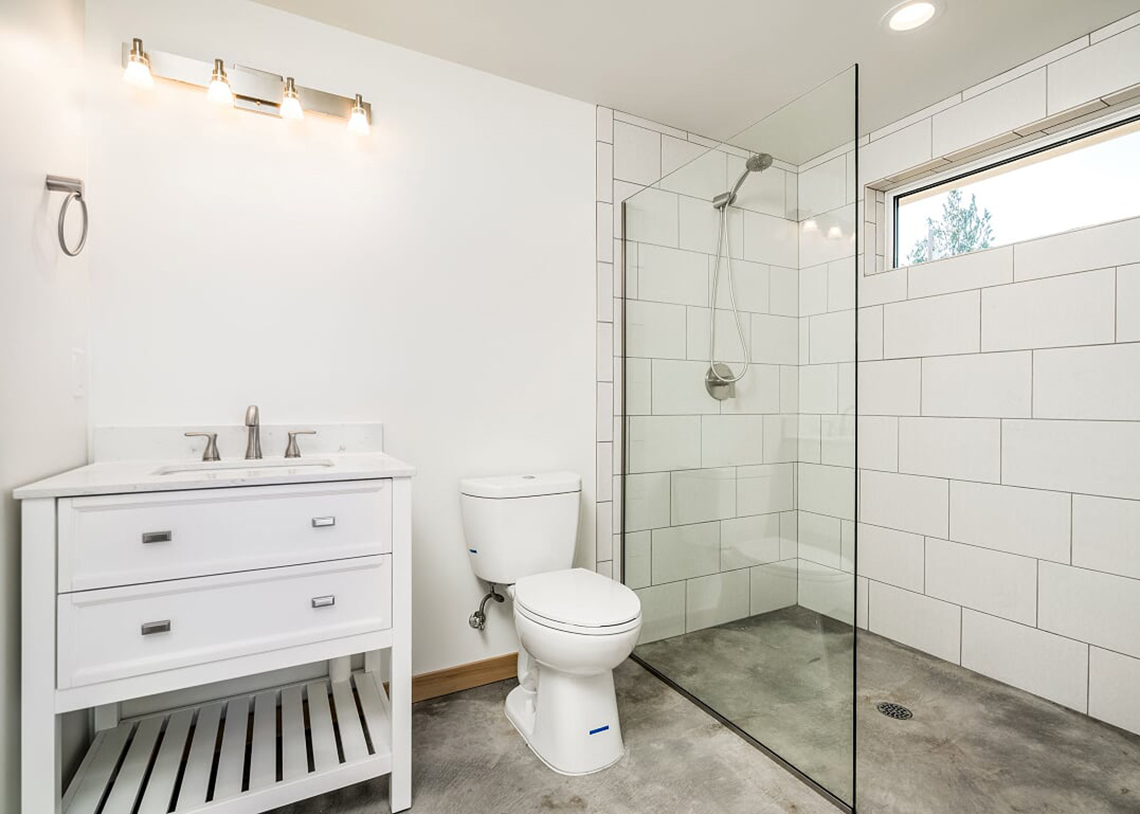
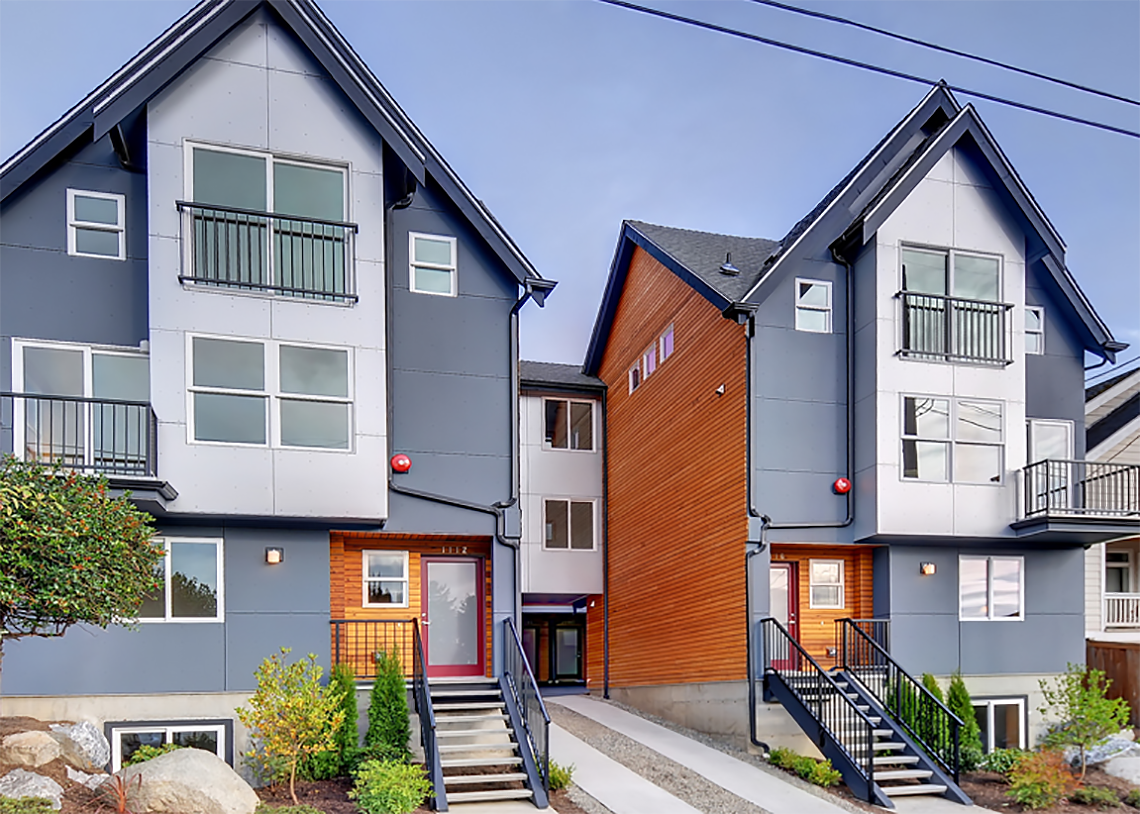
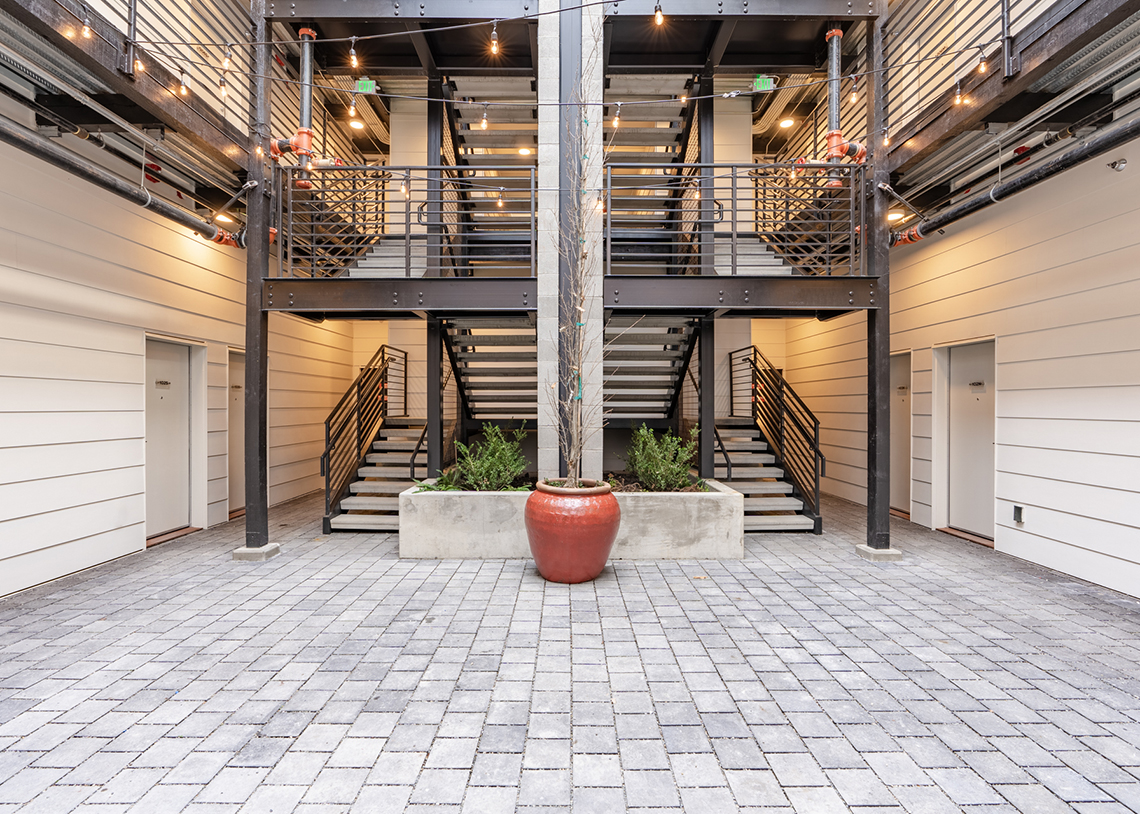
    On the charming main strip of Madrona is situated a combination of townhouses and live-work units constructed by Denizen Development Group, known as Madrona 12. Blending seamlessly into the neighborhood, the units form part of the small-town community feel of Madrona, with convenient access to the library, schools, shops, restaurants, and parks nearby. The four live-work units are easily accessible from the street and will hopefully bring more commercial space to the neighborhood.

    High above on the rooftop sits a feature for the homeowners to enjoy: green roofs. Overall, the green roofs total about a quarter of the rooftop space, while the remainder is deck space to entertain and take in the surrounding scenery.

    Vital Stats

    Section

    Points

    Location: Madrona, Seattle
    Star Level: 4-Star 
    Checklist: Single-Family/Townhome
    Verifier: Evergreen Certified
    Site and Water 143
    Energy Efficiency 98
    Health and Indoor Air Quality 99
    Material Efficiency 77
      Total Score 479


    Other features that will go unnoticed, including by the homeowners, are the low blower door scores and high density blown-in fiberglass insulation in the walls and ceilings. Those, working in tandem with the full R-10 sub-slab insulation, ductless mini-splits, and high-efficiency gas tankless water heaters, will have a big impact on energy savings.

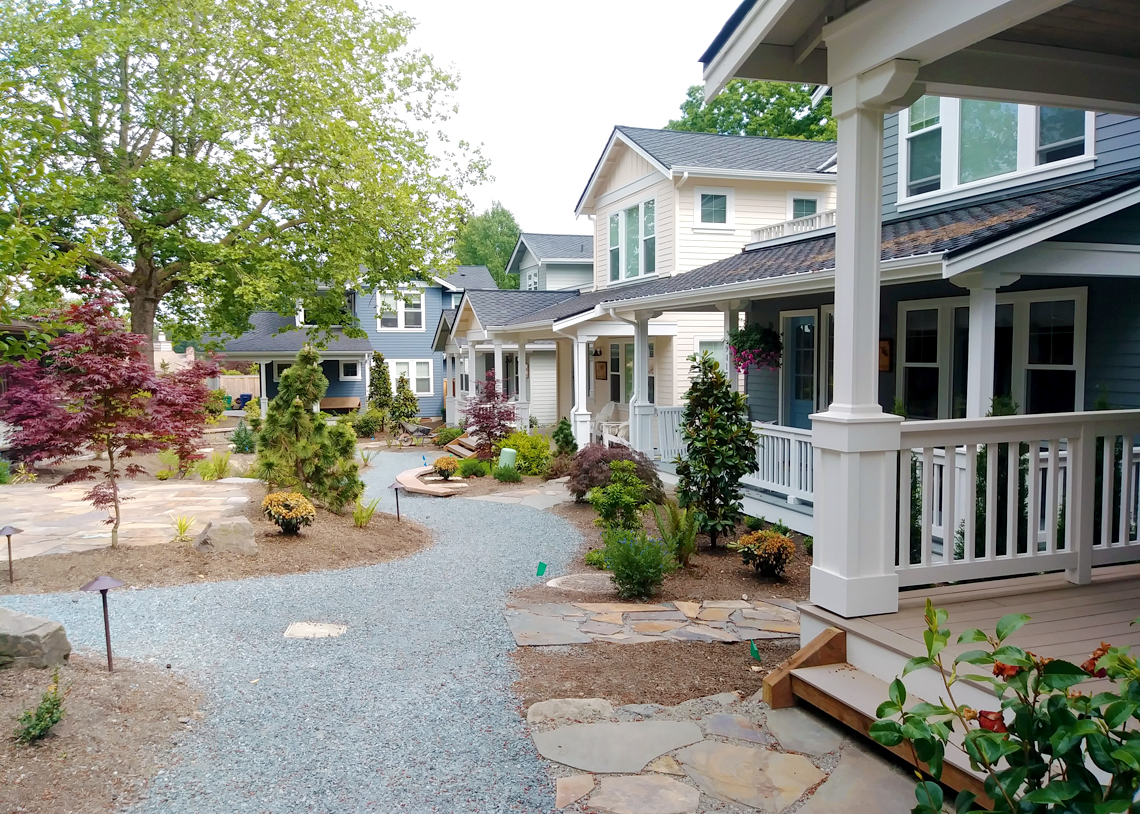
    Denizen Development Group Madrona 12 Built Green 4-Star live/work townhomes courtyard

    For good indoor air quality, Denizen used all low-VOC, low-toxic paints, caulks, finishes, and adhesives, and many certified products, such as CRI Green Label carpet. Their commercial-grade housewrap, rainscreen under the siding, drainage mat around the foundation, and back dams on doors and windows is sure to keep weather and water out of the units, hopefully keeping it a healthy environment for a long time to come. In addition, Madrona 12 also used an abundance of locally and regionally made materials, from the pavers to the siding and the studs in between.

    Built Green Highlights

    Site and Water

    • All pervious hardscaping
    • Green roof!
    • No turf grass and drought-tolerant landscaping
    • Low-flow EPA WaterSense-certified plumbing fixtures

    Energy Efficiency

    • Energy consumption reduced by 29% compared to code
    • Commercial-grade VaproShield housewrap
    • Full rigid sub-slab insulation and fiberglass BIBs in walls and ceiling
    • Energy Star Appliances and all LED lighting
    • 2.5ACH @ 50Pa average blower door score
    Denizen Development Group Madrona 12 Built Green 4-Star live/work townhomes entry doors
    Denizen Development Group Madrona 12 Built Green 4-Star live/work townhomes green roof
    Denizen Development Group Madrona 12 Built Green 4-Star live/work townhomes small in-unit commercial space
     

    Health and Indoor Air Quality

    • Rainscreen drainage plane beneath the siding
    • Sloped sill pan with back and end dams on windows and doors
    • Low VOC paints, finishes, and adhesives
    • CRI Green Label Plus-certified carpet

    Materials Efficiency

    • Extensive use of locally produced material
    • Recycled content underlayment, tiles, and carpet pad
    • 100% recycled content plastic decking material
    • Metal and blocks siding accents
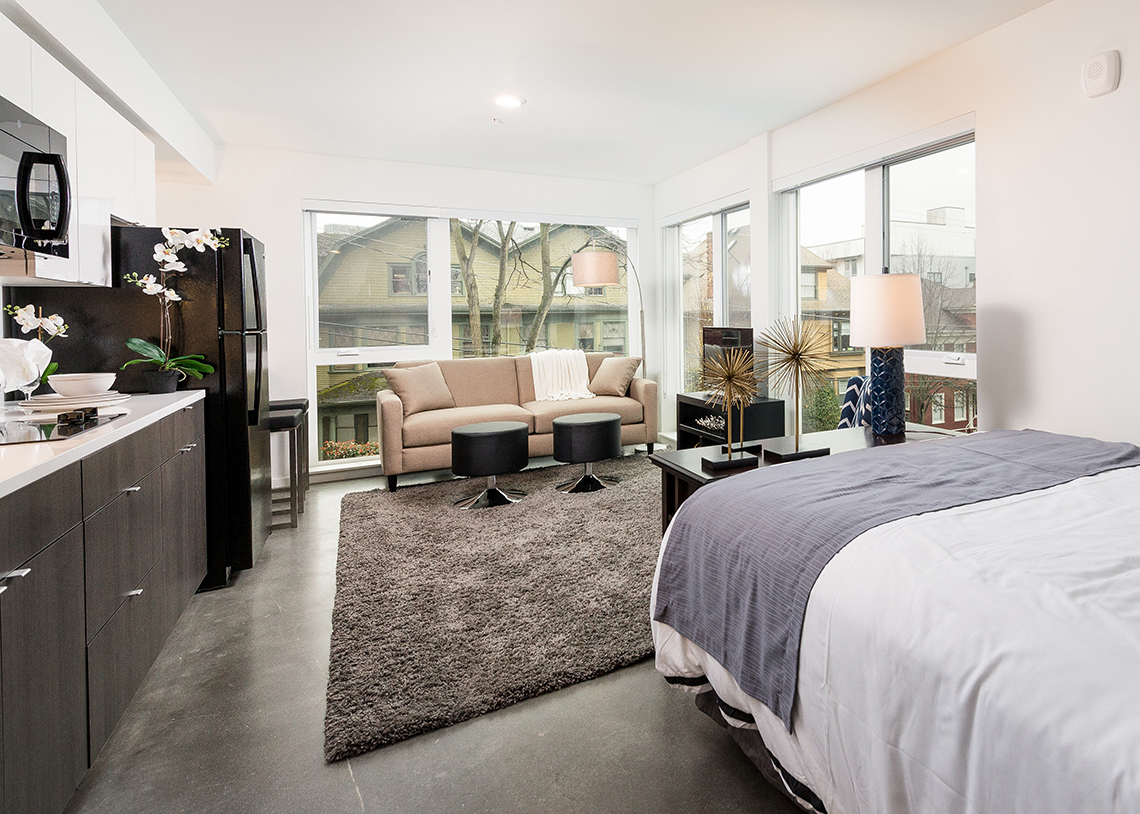
    Denizen Development Group Madrona 12 Built Green 4-Star live/work townhomes kitchen and living room
    Denizen Development Group Madrona 12 Built Green 4-Star live/work townhomes bedroom
  • July 2019 Builders Bulletin: OFM Releases Annual Population Estimates

    by User Not Found | Jun 28, 2019

    By MBAKS Senior Policy Analyst Allison Butcher

    The Washington State Office of Financial Management has released its April 1 official population estimates of all cities and towns of the state, showing continued strong population growth. According to the annual estimates, the state’s population grew by 118,840 persons, a 1.6 % increase over the past year. The Puget Sound region’s population as of April 1, 2019 was 4,198,400. You’ll find the breakdown by county in this month’s Builders Bulletin.

    The Builder's Bulletin is intended to provide a convenient way to track housing in our market and includes information from the Northwest Multiple Listing Service, State of the Cities Data Systems, Office of Financial Management and the Washington State Employment Security Department.

    Download this month's report:

    July 2019 Builders Bulletin

  • Great Outdoors: How to Make the Most of Your Outdoor Floorspace

    by User Not Found | Jun 27, 2019

    Colorful backyard patio

    Q: How can we increase the livability, comfort, and enjoyment of our home without investing significant funds or incurring massive debt?

    A: Adding outdoor living space and other amenities can be an inexpensive way to improve your home and your quality of life. It’s unsurprising that recent industry surveys reveal that outdoor living spaces are growing in popularity, even in cool, wet climates like the Pacific Northwest. A covered patio can serve as a living space nearly year-round, especially if it features a fireplace, radiant heaters, or even just strategically placed landscape elements to insulate you from the damp environment. 

    Depending on your lifestyle, this can be a viable cost-saving alternative to more interior floor space. But be aware that while options like an outdoor kitchen, entertainment center, and stamped concrete flooring can add enjoyment to an outdoor space, they can also drive up the cost to levels comparable to adding new conventional floorspace. Figure out what you want to do with the space and judiciously decide what you really need. It will save you money and headaches!

    If you have a covered patio adjacent to your primary living area, it’s possible—but very expensive—to install an operable glass wall that completely opens the outdoor space to the interior, dramatically expanding interior living space. This is something to consider doing instead of building a much larger interior living space, especially if that space only accommodates large groups a few times a year.

    Regardless of what you decide to do with your outdoor living space, it’s important to remember that the quality of the surrounding environment can have a big impact on the quality of the space. Here are a few things to consider before you begin your project:

    Views

    If you have a beautiful view to enjoy, make sure it will persist when plants and trees mature, both in your yard and the neighbors’. On a related note, if you want to enjoy a degree of privacy, then you should integrate appropriate screening into the design, whether it be a privacy wall or mature plantings.

    Trees

    If large trees surround the outdoor space, consider removing or thinning them to let in more light and prevent needles or leaves from accumulating. If preserving trees is important to you, then the space should be strategically located to minimize the impact on established root systems and future tree growth. A professional arborist can provide recommendations on the best way to do this.

    Sound

    If you are bombarded with unwanted sounds (traffic, neighbors, or mechanical equipment), consider including a water feature, sound system/proofing, large plantings, or fencing to reduce their impact.

    Smell

    Unpleasant odors can make an otherwise enjoyable outdoor space intolerable. While fragrant plants can help mask the smell of animals, stagnant water, or furnace exhaust, some plants produce their own unpleasant odors and allergic reactions. If possible, place seating areas upwind of exhaust vents, garbage cans, and other smelly sources, then seek out a qualified landscape architect for valuable guidance on plant selection to mitigate any unavoidable odors.

    Once you have a plan to address all the above issues—or if you’re lucky enough to not have any of these issues to begin with—it’s time to get started on the fun part: designing and creating your new outdoor space. Good luck and remember, have fun! These are the great outdoors after all. 


    Philip W. Frisk, AIA, is a principal at PWF Architecture, a member of the Master Builders Association of King and Snohomish Counties (MBAKS). If you have a home improvement, remodeling, or residential homebuilding question you’d like answered by one of MBAKS’ nearly 2,800 members, write to homework@mbaks.com.

  • Take the Fun Outside With a Paver Patio

    by User Not Found | Jun 20, 2019

    Two women relaxing on a paver patio

    Q: I’ve decided to add a paver patio to my backyard for home entertaining, but I’m uncertain about the challenges involved. I’m also not sure if I should hire a contractor or do it myself. What do you suggest?

    A: You’ve made a great choice. Paver patios provide sturdy and lasting foundations for exterior living spaces like outdoor kitchens and entertainment areas. Whether you hire a contractor or go the DIY route really depends on the project’s size and sophistication, as well as your skill level, available time, and patience—you can’t rush landscaping projects.

    While the DIY approach will save you money on labor, it will also require much more work from you. To successfully complete a paver patio with minimal frustration, you will need your own equipment and materials, reliable people to assist, and ample time. In contrast, hiring an experienced contractor will be easier, less time-consuming, and convenient, and you’ll have peace of mind knowing an expert is on the job. Ultimately, your own comfort level with the project should guide your decision.

    To help, here are a few things to consider before you begin.

    First, get a handle on the project’s scope and complexity. A typical DIY patio project is a simple, small rectangular paver patio with a basic pattern in a completely flat and level yard. Most online video instructions provide enough information for basic patio installations. If you pursue such a project, I highly recommend including a paver border in a contrasting color to create a professional-looking finish frame.

    Adding scope and complexity will increase the difficulty. For example, the bigger your patio, the more time and labor it will take to complete. From site excavation to placing pavers, more paving area means more work. And if your site is not level, includes curves and other tricky designs, or has landscape features such as trees, the difficulty level will quickly rise. At this point, a contractor may make more sense. 

    Second, consider the actual timeline and workflow required. To give you a sense of the work involved, here is a very basic outline of the process for physically installing a paver patio; more detailed instructions and videos are available on our website.

    1. Excavate to prepare the site: Excavate the area by removing grass and digging down at least 7½.”
    2. Prepare the paver base: Add 5/8” minus gravel sub-base and level to 1/4” slope away from house.
    3. Place pavers: Place pavers in your chosen pattern over a 1” sand base and add edge restraints to hold them in place.
    4. Compact and add joint sand: Compact the patio for proper paver interlock and add joint sand to stabilize.
    5. Clean and seal: Enjoy your new patio!

    Bottom line? Hardscaping with paver patios will add structure and beauty to your yard that will last for years. Whether you choose to take on the project yourself or hire a contractor is up to you based on your own skill, time, resources, and comfort level. Whatever you decide, paver patios are a worthwhile investment that will add value to your home and inspire you and your friends to take the fun outside. 


    Laura Hoffman heads marketing and communications for Mutual Materials, a member of the Master Builders Association of King and Snohomish Counties (MBAKS). If you have a home improvement, remodeling, or residential homebuilding question you’d like answered by one of MBAKS’ nearly 2,800 members, write to homework@mbaks.com.

  • Is Your Concrete Sinking? Consider a Polyurethane Foam Solution

    by User Not Found | Jun 13, 2019

    Sinking concrete

    Q: We recently noticed that part of the concrete walkway connecting our driveway with the front door has begun to tilt slightly in one direction. Is there anything we can do to make it level again without breaking the bank?

    A: Sinking or uneven concrete can be dangerous. If you’ve ever tripped over an uneven section of sidewalk or slipped on ice formed in settled areas of your driveway, you know the risks firsthand. Concrete issues can impact the safety of your home, as well as its value; ignoring them can be a recipe for severe structural damage and serious injury.

    Concrete is a very strong, durable material. After all, it’s the building material of choice for heavily trafficked spaces, from airport runways and sidewalks to driveways and foundations. However, for all its strength and usefulness, concrete has a finite lifespan.

    Over time, concrete slabs can suffer a variety of problems, including sinking and unevenness, breaking and chipping, surface pitting, flaking, and deterioration. With our wet northwest winters, the soil under concrete slabs can become saturated and soft or wash out completely. The risk becomes higher when the soil below the slab is poorly compacted.

    Fortunately, there is a fantastic solution for lifting and leveling sinking concrete: polyurethane foam. There are many polyurethane products and methods on the market. For both price and effectiveness, I recommend PolyLevel.

    Whatever product you use, the polyurethane foam method takes the old-school concept of mudjacking and updates it with the latest technology and techniques. Rather than using a mixture of concrete and mud, this method uses high-density, lightweight, structural-grade polymers to lift, level, and stabilize slabs, making it easy to return surfaces to desired levels.

    This method is significantly less expensive than concrete replacement and has numerous advantages over mudjacking: smaller injection sites, no messy concrete “blowouts,” negligible added weight to underlying soil, and zero chance of washout. It’s also environmentally friendlier than mudjacking. The foam does not degrade under the slab, so there is no need to worry about contamination of soil or groundwater with dangerous compounds.

    Polyurethane foam is strong and permanent. It is used in many major commercial projects to lift and stabilize extremely heavy structures and surfaces with much heavier traffic than residential concrete, including roads, bridges, and industrial buildings. An extensive study in 2006 by the Argonne National Laboratory in Illinois concluded that the longevity of rigid polyurethane foam is more than 1,000 years in landfill conditions, a similar environment to the one found under a typical concrete slab.

    So if you need to tame out-of-control concrete, polyurethane foam is the environmentally safe, affordable, waterproof, and, perhaps most importantly, permanent solution you’re looking for.


    Jim Wiederaenders is a senior design technician at Matvey Foundation Repair, a member of the Master Builders Association of King and Snohomish Counties (MBAKS). If you have a home improvement, remodeling, or residential homebuilding question you’d like answered by one of MBAKS’ nearly 2,800 members, write to homework@mbaks.com.

RESOURCES AND GUIDES

Help us build a sound future.